česky | cymraeg | deutsch | english | español | français | italiano | nederlands | polski | português --- more step-by-step guides
How to install a client certificate (Step-by-step Guide)
This is a detailed description how to install a client certificate.
Recommended method
Follow the Using the web application to generate a client certificate
Alternative method with an already generated CSR application
Prerequisite: you have already created a certificate request with XCA, OpenSSL, Cleopatra, etc.
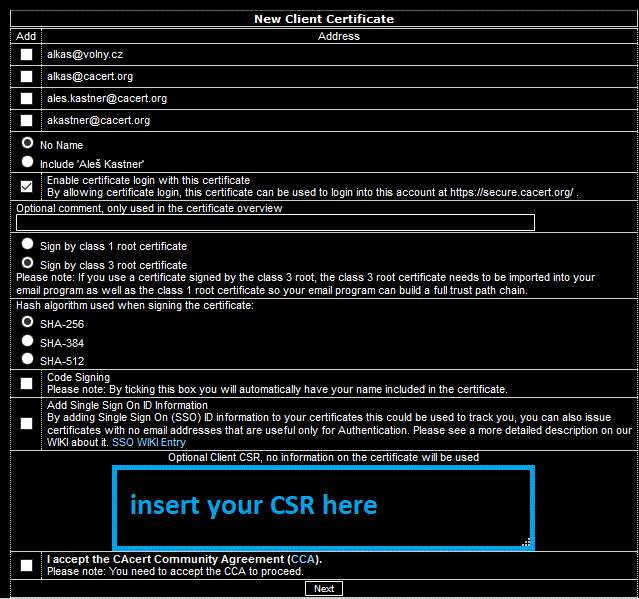
Login to your CAcert account. Then in the menu at the right side go to "Client Certificates" --> "New". At the page opening in the first line check at "Add" the email addresses you want to referred by the certificate.
Next, if you have more than 50 assurance points, select the name variant (the name parts) you want to have in the client certificate. "Enable certificate login with this certificate" should be checked, it is default. If you check it, better select "No Single Sign On ID". Then select, which root should your certificate signed with: either Class 1 or Class 3. Use Class 3 always.

Paste the externally created CSR request by copying (Ctrl-C) the contents of the CSR file and pasting (Ctrl-V) it into the highlighted text box. Then confirm by checking CCA and press the "Next" button.
Check "I accept the CAcert Community Agreement" and press the "Next" button. Now the CSR request is sent to CAcert, signed, registered and the resulting certificate is sent back (to be saved by the browser, displayed and offered for download). The private key will not normally leave your computer (or the certificate store of the program that created it with the CSR request).
The CAcert server works for a certain period of time and then you will see the menu:
- Install the certificate into your browser
- Download the certificate in PEM format
- Download the certificate in DER format
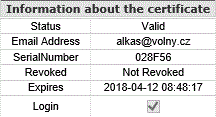
and the contents of the new client certificate. A basic information about the new certificate is added. An example follows:

CAcert web also sends an informative message (with the link to the new certificate) to your email address.
Normally you should select the first option, but you can also select the second or third option to save the certificate as a disk file and install it manually. I assume you select the first option. Then you get the message "Your personal certificate has been installed. You should create a security copy (backup) of your certificate". If you click "OK", all is done.
In Firefox 126.0.1 at "Open menu -> Settings -> Privacy and Security -> roll down, then click the button "View certificates". The Certificate Manager window opens. You can check in the tab "Your Certificates", whether your new certificate is present.
Now you can select this certificate and click to "Backup...". Then you get a file menu where you can select into which directory and under which file name you want to safe the certificate file. Take care for this file. It contains the complete certificate including the private key. If it falls in the the hands of the wrong people (criminals), they can take over your identity and use certificates in your name.
