česky | english
Digital signing of Adobe Acrobat Reader PDF documents
How to import your Certificate into Adobe Reader
Adobe Reader is a PDF file reader, with Form and Digital Signatures support.
Older versions
Open menu 'Document' 'Manage Trusted Identities'. Change 'Display' from 'Contacts' to 'Certificates'. Open the 'Add Contacts' dialog. With 'Browse' choose the cacert - root_X0F.crt certificate file. Click on 'Import'. Now the Cacert Signing Authority shows in the dialog. Select it and edit the Trust settings.
Version XI
Menu Edit - Preferences, in the dialogue select Signatures on the left side. In the frame "Identities & Trusted Certificates" press "More...". In the next window: on the left side select Trusted Certificates, then at the top of the window press Import.
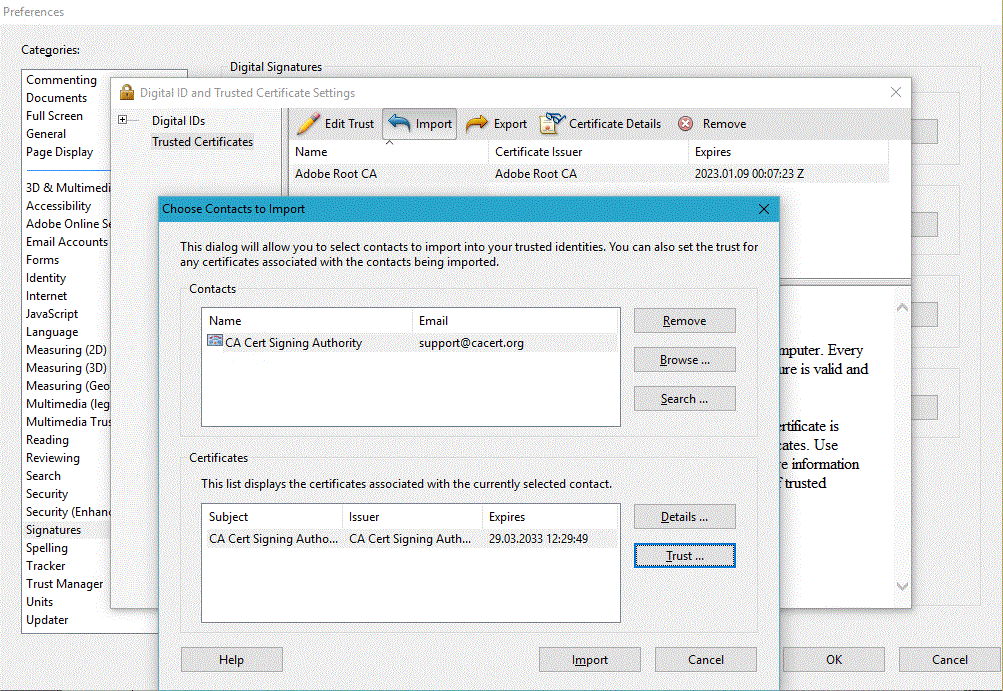
- In the upper frame press Browse: the certificate files window will open. Find the root certificate downloaded from the CAcert website (root_X0F.crt). Select it in the upper frame, then also in the bottom frame. You can display Details, then press Trust and give the certificate trust for document signing. Then press Import button at the bottom. Confirm a message.
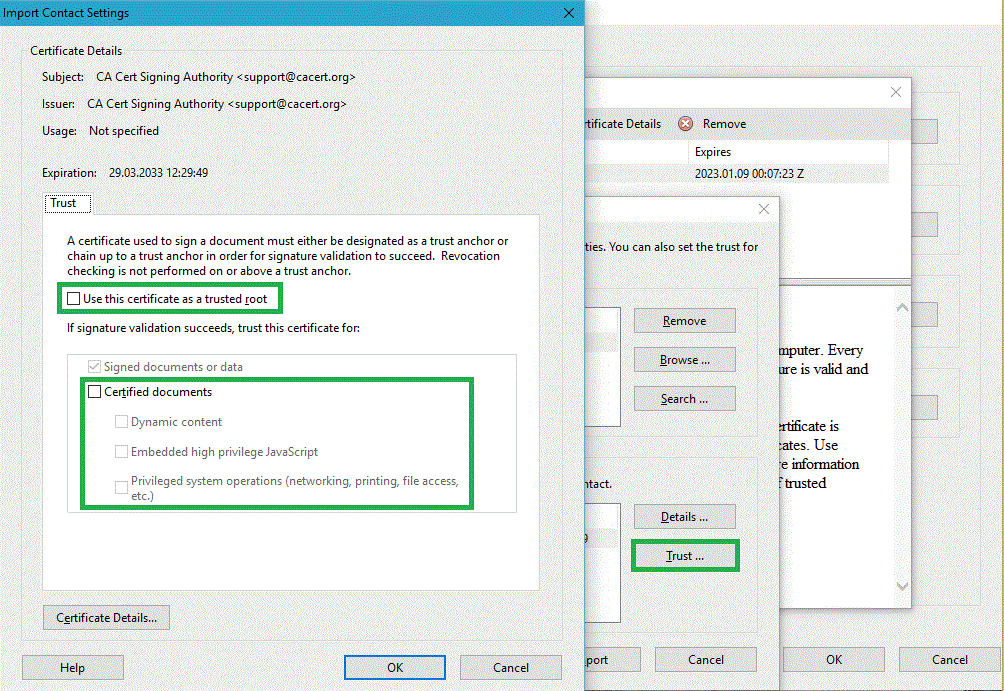
- Repeat for the class 3 root certificate file (class3_x14E228.crt). No need to set the trust.
Now select "Digital IDs" in the dialogue "Digital ID and Trusted Certificate Settings". Press the upper "+ Add ID" button. Choose "My existing digital ID from:" - "A file". Next, select the file of your certificate with the private key (.PFX or .P12 suffixes). Open the certificate entering the password, which you have set for the private key. Press Finish, the certificate will be saved after CRL check. You may see its "Certificate Details" including its path to CA. You may want to repeat this process for your other client certificates. Close the dialogue with the upper right "cross", then close the preferences with OK.
Version DC
The same process takes place as for the XI version. The Adobe Reader uses the Windows system repository (Windows probably from version 7, verified on the version 8), and the trust states in it.
How to sign a document/form with Adobe Reader
See How to sign a document in Adobe Reader
Version XI
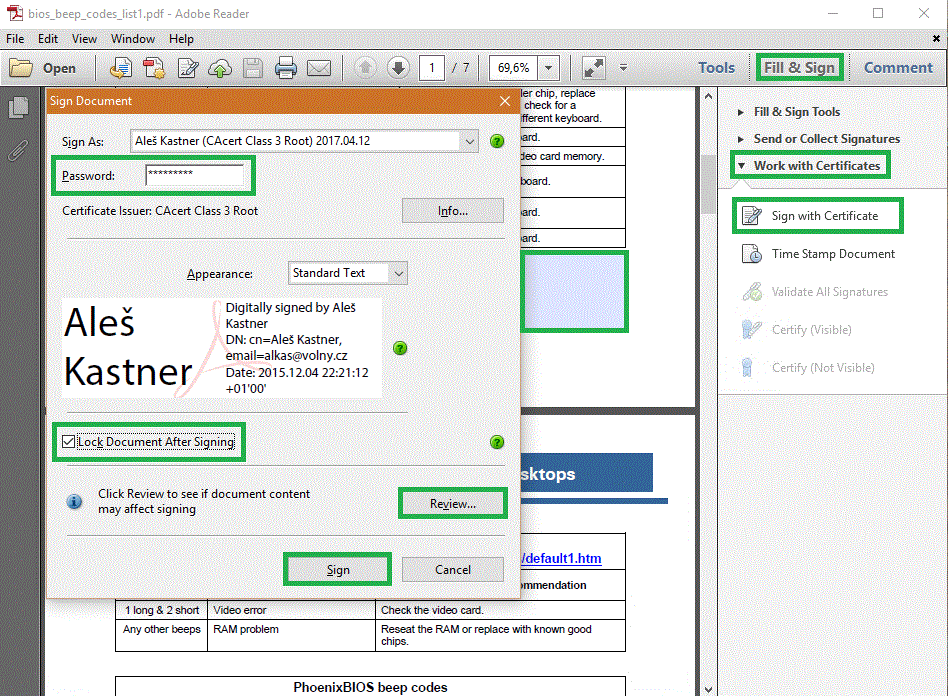
Basically, the signing with your client certificate apply. There is the "Fill & Sign" possibility in the toolbar. Select "Work with certificates" - "Sign with Certificate". Press "Drag New Signature Rectangle..." in the next dialogue, then drag a rectangle in the document, new dialogue appears. Select the signing certificate, enter password, and press Sign. ("Review..." will figure out, whether or not the signature will impact on the document layout; the document can also be locked after signing.) The signed document can be saved under another name.
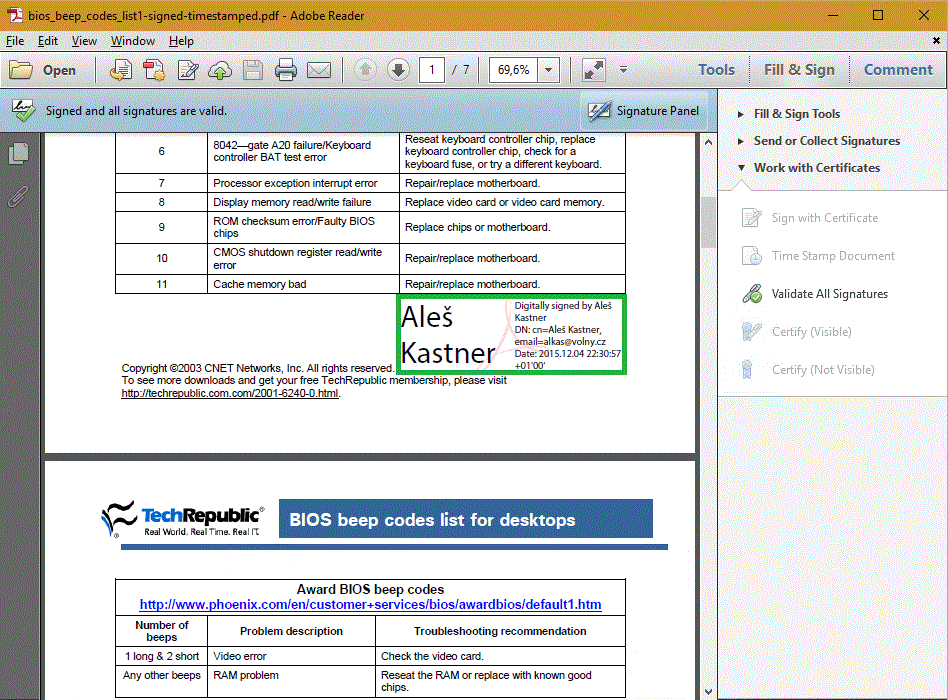
The information about the signature will appear in the frame (rectangle) you have created.
Version DC
The procedure: open the document - Tools (toolbar) - Certificates-Open - Digitally sign. After confirming a small notice dialog, create a rectangle. Next procedure is the same as in the version XI.
How to make a PDF with Adobe Acrobat
See How to Adobe Acrobat Dokumente mit CAcert Zertifikaten signieren (german, at the moment)
 This link does not work
PDF document time stamping in Adobe Acrobat Reader
Set the time stamping server
Adobe Reader version XI
Open the Preferences from the Edit menu. Select the "Signatures" line on the left side. The bottom right frame configures time stamps. Press the "More..." button. A dialogue opens. Select (on the left) "Time Stamp Servers", then (at the top) press New. Name the server with a friendly name, and enter its URL. (An example: server http://tsa.safecreative.org/, not requiring login.) Press OK.
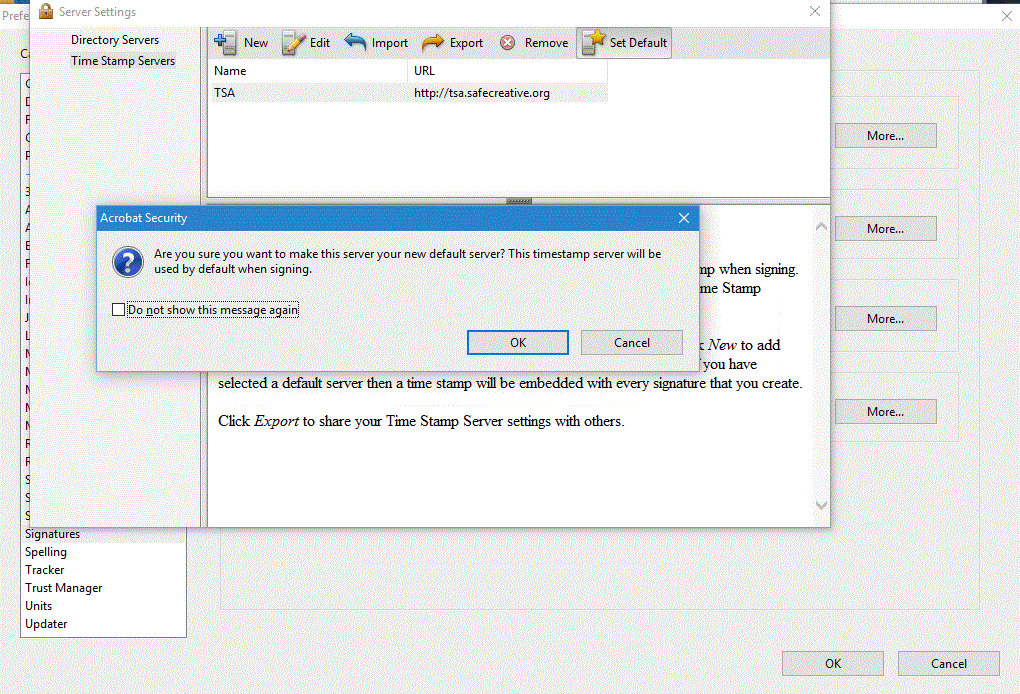
Server appears in the list in the preceding dialogue. Mark it as the default one (else you cannot use the time stamping). Close the dialogue, and close the Preferences, too.
Adobe Reader version DC
Settings are the same as with the version XI.
Write a time stamp into the document
Adobe Reader version XI
Open the document you want add a time stamp to. Select "Fill & Sign" from the toolbar, then "Work with Certificates" - "Time Stamp document". At the first use of a time stamp server the question appears, whether or not you trust that server. You have to confirm the trust for the document to be marked. The document can be then saved under another name, equally with the function "Save as..."
Note: If the default time stamp server is configured, then the document is marked with a time stamp when digitally signed.
Adobe Reader version DC
Open the document you want add a time stamp to. Select Tools from the toolbar, then Certificates-Open and Time stamp from the next toolbar, which will appear). Next procedure is the same as described above at the version XI; also the Note apply.
