Password error when trying to install Firefox v.59.x.x exported .p12 file into Windows
Since the version 59.0.1, Mozilla has changed the private keys cryptographic algorithm iteration of .p12 files, exported by Firefox. The format of such files (with .p12 or .pfx suffix) is known as PKCS12.
The iteration: the private key is protected by cryptographic algorithm (e.g. 3DES), which is repeated n times, where n = 1 000 000 (1 million) starting with the version 59.0.1; the number n used to be much smaller before (e.g. 2048).
PKCS12 file usually contains 4 or 3 parts:
The private key encrypted n-times (iteration).
- The certificate chain:
- Certification Authority main root certificate (CAcert Class 1 root),
- Certification Authority intermediate certificate (CAcert Class 3 root; can be omitted, if your certificate is signed with Class 1),
- Your certificate containing the corresponding public key.
The Windows' decipher algorithm is unable to perform 1 million iterations. The error message "Wrong password" is reported then, although the password can be correct.
The workaround is simply to use any previous version of Firefox (until 58.0.2) and to create the .p12 file with it.
The more sophisticated method exists using import-export of .p12 files, produced by Firefox 59.x.x, with another software, as openssl or XCA. This manipulation is relatively complex; it needs entering the password several times with no error. If you are interested, use OpenSSL for Windows (Downloads):
openssl pkcs12 -in <backup-file-from-Firefox>.p12 -passin pass:<password> -passout pass:<password> | openssl pkcs12 -export -out <backup-file-for-windows>.pfx -passin pass:<password> -passout pass:<password> |
You need to enter the same password 4 times, because 1st command deciphers PKCS12 (1st), enciphers it to PEM (2nd), and then 2nd command deciphers PEM (3rd), and finally enciphers it to PKCS12 again (4th).
If you like a GUI more, you can convert a .p12 file with XCA program. For its installation and the first run see the article "How to create a client certificate in Windows with the XCA utility (including PKCS12 backup)".
You need to get a backup file with any less number of iterations, because such a file is acceptable by Windows. To achieve that, first import the file, originally exported by Firefox, into XCA. Then export its imported portions (your certificate and the corresponding private key) in the PKCS12 format to .p12 or .pfx file.
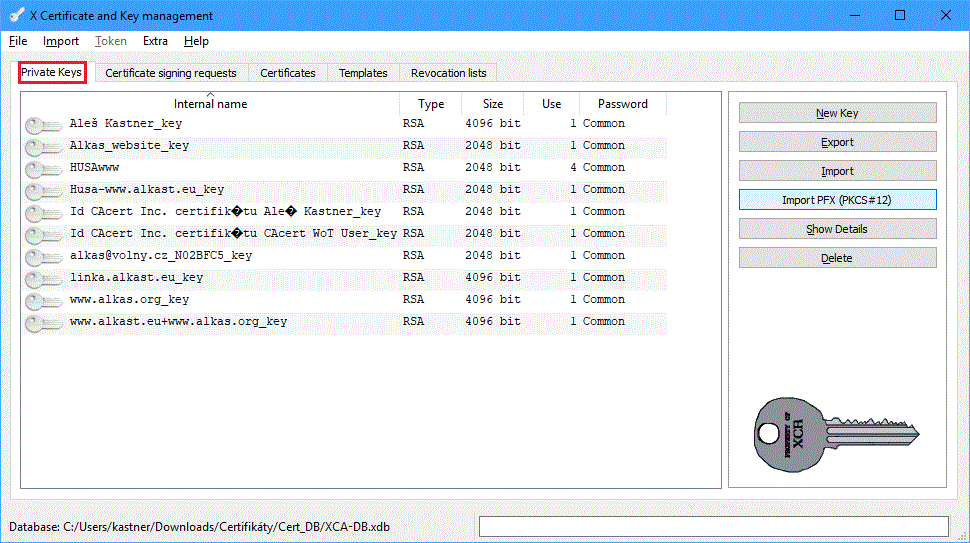
After XCA starts for the first time, it creates the certificate repository database and asks for the repository's password. Next time you run XCA, you have to enter that password, and then the XCA main window appears, containing the information about private keys stored. Switch to the Certificates tab, where you can see a tree structure of certificates stored. You can start the .p12 or .pfx file import from both tabs using the "Import PKCS#12" button.
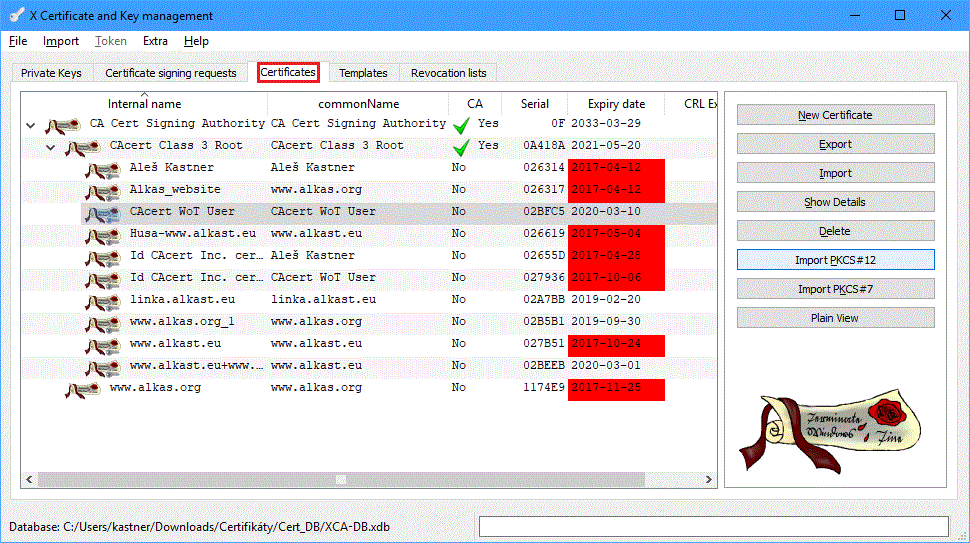
Press the "Import PKCS#12" button, select the file to import, and enter its password. The backup file .p12, exported from Firefox, contains 4 or 3 parts described before. After XCA opens the backup .p12 file, it displays the following window:

You can see in that window, that Firefox has added one or two root certificates of the Certificate Authority. If you import them all, the roots will be saved to your (or computer's) container. However, you have already the roots in another Windows containers.
You can display the contents of any certificate read from a .p12 file by pressing the "Details" button.
XCA offers two possibilities now:
- Select only needed parts of the .p12 file for export. Those are the certificate issued by CA for you and its corresponding private key (previous picture).
- Delete unnecessary roots using the "Remove from list" button, and import the rest (the following picture).
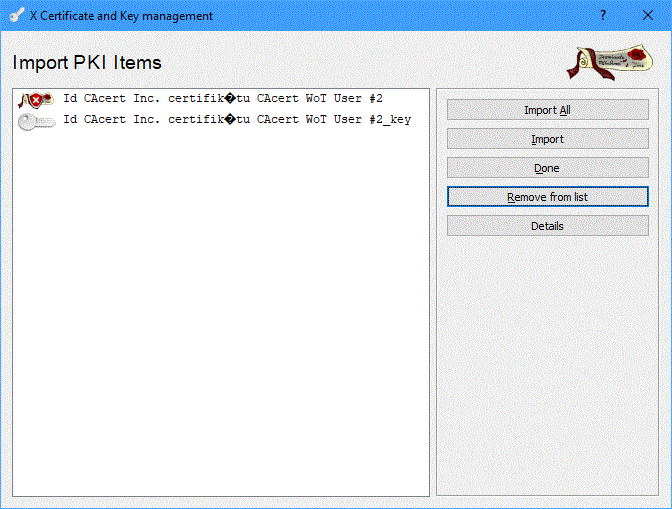
Now, import the certificate and the corresponding private key using either the "Import" button (1.) or the "Import All" button (2.). Import window can be closed by pressing the "Done" button. Your certificate and the corresponding private key will be stored into the XCA repository database.
We can start the subsequent export to a .pfx or .p12 file from the "Certificates" tab by pressing "Export". A new window will open, where you need to select the proper export format. It is the PKCS#12 format again. Your certificate and the corresponding enciphered private key will be exported there, and the iteration will be accepted by Windows.
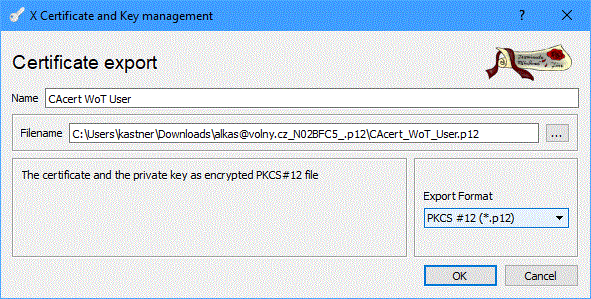
The second step is to select the location and the name of the output file. XCA offers the name of the original .p12 file as the directory containing the PKCS12 exported file. This certainly does not work, because your original backup exists as a .p12 file, not as a directory. Thus, change the pathname like this:
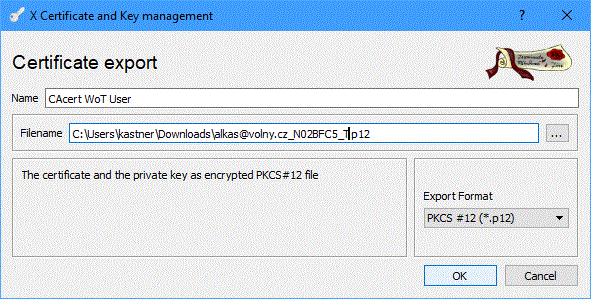
The third step is to enter the password for the private key encipher. You have to enter the password twice.
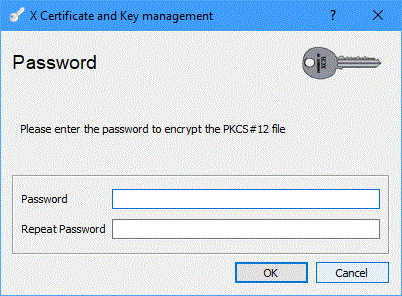
After you enter the password, press OK. The output PKCS#12 formatted file is now created and ready for the import to Windows.
